Step-by-Step Setup AMD Radeon Vega 56 / Vega 64 – This guide summarizes what I have found that works and integrates, step by step, the details that you also need to get. In many cases, this information does not come from me. However, I did not find any links with all the links that worked for me. Here are all the details in one place. Good luck

Step-by-step setup AMD Radeon VEGA for mining
1) Plug 1 Vega 56/64 into the PCI-Express X4 or X16 slot without risers directly into the motherboard.
2) Format the HDD / SSD with Windows and install Windows 10 (this is important! The zero Windows that was installed on the Nvidia card adds hemorrhoids. Only a clean installation from scratch.
3) We start the system.
3.1) kill updates, etc.
3.2) Increase the amount of virtual memory
Control Panel / System and Security / Advanced System Settings / Advanced
Click on the button Options> Performance Options> Advanced>
We see the inscription virtual memory and click Change, we specify 15 gigabytes for each vega. (If there is not so much memory, you can also put 8 gigs per card, experienced from the forum say and it works)
I have 4 of them, so we will put 60,000 mb. Original Size 59000 – Maximum Size 60,000 My Case Original size 32000 – Maximum size 32000 – should also work
4) In the control panel, change the power settings:
- Power> Change circuit settings: Turn off display: Never
- Put your computer to sleep: Never
- Click “Save Changes.”
5) Download the AMD Blockchain driver:
6) Install the drivers and all their components and wait until the card calms down. During the installation, we don’t touch or pull anything; at the end of the installation, the program will offer a reboot, usually when it is clicked it may also hang. Feel free to put the system into reboot.
7) After installing the drivers, click on: Games> Global Settings> We will have two columns 1 – Global Graphics (Radeon RX Vega) 2 – Global Wattman (Radeon Rx Vega) In the first column, we need to click on the HBCC Memory Segment button and put it in the on position. And then click apply. The driver will go into reboot.
Here is an important nuance. Sometimes the checkmark is already enabled, but HBCC is actually disabled. AMD is aware of this problem and, in principle, suggests not paying attention to it, that is, if HBCC is on and the hash is small, just move the slider to the off position and the HBCC miracle will actually work.
Then go to 2 – Global Wattman (Radeon Rx Vega) and do not touch anything there except the cooler settings. SPEED (RPM) Manually We put the slider in the on position and raise the cooler speed. This is necessary so that at the first start of the miner the card does not heat up to 78 degrees and does not begin to smoke with gaskets. 8) Run the miner. In my case, it is cast_xmr.
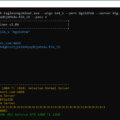
Example batch file:
cast_xmr-vega  -S xmr-eu.dwarfpool.com:8100 -u
47BCGhAqrj8ZN5UQgLkW7x5qx7vrYQwMwHDiPsNEhQdMCbnC6UGYzP8GccsHPAUffN4c8NLJoU4bBMp2sjiXuwTx59gJZ7J  -G 0 %*
And look at the hashrate metrics There should be 1500-1900 depending on the map. If the values are smaller, turn off the miner and go to the driver to enable / disable HBCC Memory Segment. Leave the miner to work like this for 15-20 minutes.
9) Turn off the miner through the “q” button. If you crave a cross in a batch file, there is a chance somewhere around 20 percent that the drivers will fall off (not very good for us)
10) We transfer the card to the riser and once again launch the miner. If everything is ok, then we connect the second card. We connect the card to a separate braid and a riser to a separate braid. This is not 1050, she is very moody in stock. 2 per braid = hemorrhoids.
IMPORTANT! Do not connect 3-4 cards at once, they load the hard drive out of the box and the whole system flies into eternal reboot or crashes the driver. AMD knows this problem and promises to fix it.
When a second card is connected, the AMD CrossFire rectangle appears in the drivers; it should be in the Off position. (Disconnected i.e.) Usually, if you turn it on one by one, it is immediately turned off, if not, turn it off. Now we have 4 columns, respectively, each map has its own settings and Wattman. We repeat paragraphs 8 and 9. Having previously added the following map to the batch file in paragraph -G 0,1, make changes.
11) Run the miner. And let’s go to Wattman
We set -10 for the core and -5 for power and leave the memory at standard values (800). As the miner works, every minute we roll -5 on the core and -1 on power until we have the value -20 core – 10 Limit energy consumption. (%). I do not recommend setting the parameters -30 / 950 / -10 right away, because sometimes it goes into artifacts and the devil would understand why. Once we have recorded local success, we do the same with memory. Here the step may be different. I throw 20, until it turns out 940. Somewhere I leave the stock, because Hynix is far from Samsung (well, you understand how Valera says)
12) If there are 3 and 4 cards, add them one by one and repeat the whole process. Sometimes it looks funny, 4 cards in the global chart for three HBCC is disabled, one is on while it actually works on all cards.
13) Run the miner and enjoy stable operation. When you connect 2 or more cards, the hashrate sometimes sags. I get somewhere 1650-1900 h / s per second depending on the map. And 1 error on a 20,000 ball somewhere. Everything has been working non-stop for a week. Consumption somewhere 220-240 per card.
Recommended Related Articles:
Read more:
 CryptoNight mining on AMD Radeon RX Vega

 Step by step setup AMD Radeon Vega 56/ Vega 64
 GMiner v2.30: Download, Setting for AMD Nvidia GPUs mining