You can mine cryptocurrency on almost any popular system. Many beginners prefer to work on Windows, but experienced miners have long abandoned the Microsoft product and installed professional Linux-based platforms for themselves.
One of the best platforms in this segment is Rave OS. The official website of the project started working five years ago and during this time many miners decided to download Rave OS and install it on their mining farms. Today we will tell you how to register, configure the miner itself, and so on.
Registration in RaveOS
To get started with RaveOS, you need to register. Follow the link and go through the registration process.

Registration is standard, fill in the login, e-mail, password and confirm the password. After creating an account, you will be taken to the RaveOS web management interface.

In our case, there are two workers and two rigs, you will have everything at zero.
With registration finished, we proceed to download RaveOS.
System requirements for installing Rave OS
Minimum system requirements:
- Intel® Core™ 2 or better / AMD am2+ or better
- 4 GB of RAM*
- 4 GB storage (HDD / SSD / M2 / USB
- RX Vega 56, RX Vega 64, Radeon VII, RX 5700 will require 6 GB of RAM to mine ETH (Ethereum price)
Recommended system requirements:
- Intel® Core™ i3-3220 3.3 GHz / AMD FX-6300 3.5 GHz
- 8 GB RAM
- 8 GB SSD
Download the RaveOS image
In the same window of the Web interface of the operating system, look for the Download link on the left. This link always leads to the latest and most current version of RaveOS. I recommend that you do not download the RaveOS image anywhere else, except for the official website.
The name of the image will be something like this – raveos-v1.0.24-8340-1698.img.zip. When you download, the version will already be newer.
The RaveOS image is downloaded in a zip archive, after downloading the archive, unzip it to write the image to an SSD, HDD, M.2 or flash drive.
Install the RaveOS image on the media: SSD, HDD, M.2 or flash drive
Before installing RaveOS, we need to add Worker. This is necessary in order to bind the installed RaveOS system to the created worker. So when loading RaveOS from the media, we will see the running system in the Web interface.
In the RaveOS web interface, go to the Dashboard or Workers tab and add a Worker by clicking Add Worker.

You can also add a Worker through the Workers tab.

When adding a worker, fill in the following fields:

- Name – the name of the worker.
- Description – description of the worker.
- Password – the password of the worker, in case of transferring access to other people.
- Card Quantity-a number of cards that will be in a workshop.
After downloading the RaveOS image on the PC, you need to install it on the media. The media must be at least 16Gb. We strongly recommend using SSD drives, because. they work much faster than flash drives and are more stable. If possible, you can use an M.2 SSD, but this port on the motherboard can be used for an additional video card, and choose an SSD as the carrier.
If you do decide on a flash drive, be sure to make sure that it has at least a USB 3.0 interface and is inserted into a motherboard port that supports USB 3.0, and also make sure that the flash drive has at least 16Gb of memory.
To write the image, we need an unzipped RaveOS image. Install HDD Raw Copy Tool.
Through the HDD Raw Copy Tool, we write the image of Raveos.
We launch the program, in the FILE field select the RaveOS image.

In the next window, open in the ATA field, select the media on which we will write the image.

Next, click Continue and confirm the entry.
After burning the image, we need to register our rig token in the configuration file, this will connect our system with the rig on which RaveOS will be launched.
We go to the Web interface, i.e. We log into our account in the RaveOS system, and go to the Workers tab.
Select Edit, enter the worker settings and look for the SYSTEM INFO tab. We are interested in the Worker Token field.
Copy Worker token.
We need to insert it into the OS file (the drive with the RaveOS operating system): /config/token.txt, paste the Worker’s token and save it. That’s it, with this action you connected your worker in RaveOS with the image, now when you run this image in the farm, you will see it through the control panel (web interface) of RaveOS.
After recording the image, we set up the bios of the motherboard for mining, making our media with the image a priority for recording as well.
Launching RaveOS
After writing the image to a hard disk or flash drive, and inserting the worker token into the token.txt file, mount your image to the farm. The farm may or may not be connected to a monitor. It does not matter, after starting the farm in the RaveOS web interface, you will see that your worker is online. If so, then you did everything right.
RaveOS does not see the video card, especially 3060 Ti, 3070, 3080
If RaveOS does not recognize a 3060, 3070 or 3080 video card, make sure you have installed the latest version, at least raveos-v1.0.24-8340-1698. Because older versions do not support these graphics cards. How to update rave os we will discuss further.
If RaveOS doesn’t see other graphics cards, give it a chance to initialize them. At the first boot, the system can take a very long time to initialize video cards, especially if there are a lot of them, 6 or more.
In this case, run the farm on one card, i.e. leave only one card in the motherboard, start the farm and wait until it starts. After starting and initializing the video card, turn off the farm and connect the second card, and repeat this for each farm card. This usually helps.
How to start mining in RaveOS
After the successful launch of the farm, you need to create a wallet, select a pool and a miner.
Creating a wallet in RaveOS
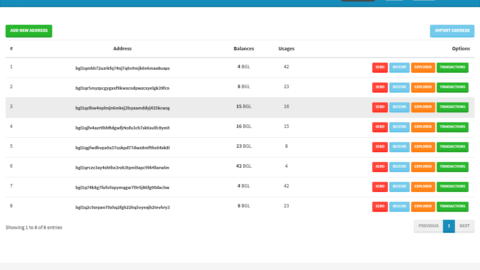
To create a wallet, go to the Wallets tab and select Add Wallet.

In the Wallet name field – enter the wallet field.

- Select a coin – select the coin we are going to mine.
- Coin name — название монеты.
- Please select pool – select a pool. We recommend registering on the Binance Boole, this is the best solution for mining ether. After selecting a pool, select servers.
- Please, fill additional information – in this field enter the name of the mining account in the binance pool.
- Please select miners – in this field, select a miner, or several miners. We recommend NBminer.
And click Save.
After creating a wallet, you can start mining in RaveOS.

- To do this, go to the Dashboard tab
- Choosing our worker
- Press the Action button
- Choosing Mining
In the next window, select a wallet, coin, pool, server, miner and start mining.
Read more:

 TT-Miner 3.0.5 Nvidia GPU miner ProgPOW (Download and Configure)
 SGMiner v4.2.1: Download Scrypt GPU Miner for Windows
  TT-Miner v3.2.2 (NVIDIA GPU miner): Download for Windows & Linux.
 WildRig Multi v0.24.1 (AMD GPU miner): Download with KAWPOW support
  NBMiner v27.7 (Nvidia/AMD): Download and Configure for Windows & Linux.
  TT-Miner v3.2.0 Nvidia GPU miner (Step-by-step setup for Windows)