GMiner is a popular GPU mining program that supports Ethereum Classic (ETC), Ravencoin (RVN), Kaspa (KAS), and many other cryptocurrencies. In this review, we’ll explain how GMiner fared during Ethereum’s transition to PoW, which algorithms and coins it supports, and how to launch the miner—in simple terms for beginners and beyond.
GMiner – Life in Mining After Ethereum PoW
Until recently, it seemed that Ethereum’s transition to Proof-of-Stake had put an end to the era of GPU mining. The leading GPU coin had disappeared from the market – so what next? Would miners really sell off their rigs en masse for cheap? Not likely. Enthusiasts quickly redirected their mining power to other coins – Ethereum Classic, Ravencoin, Ergo, Kaspa, various Ethash forks – the list goes on. And they were helped in this by one of the most versatile mining tools – GMiner . This program has essentially become a miner ‘s Swiss Army knife : it supports a multitude of algorithms, works with both Nvidia and AMD, and allows you to stay in the game even after Ethereum mining “dies.”
🎖️ A time-tested (and hashrate-tested) miner
A few words about GMiner itself are worth mentioning . It’s a cryptocurrency mining program created (by the way) by a group of Russian developers back in 2018. The first version was released on September 21, 2018, and the mining community received it warmly. In just six months, GMiner has become a favorite on Equihash algorithms. The developers don’t rest on their laurels: they constantly optimize the code, squeezing maximum performance from the hardware while minimizing power consumption. Thanks to this approach, GMiner quickly gained the trust of miners, especially those who enjoy experimenting with different coins.
The Crypto Mining Blog calls GMiner a universal miner , noting its support for multiple algorithms and automatic hardware optimization. Indeed, the program is initially designed for two platforms – NVIDIA and AMD – which is convenient for small mining rigs. Initially, the focus was on Nvidia, but now the software works perfectly on AMD rigs as well. GMiner’s interface is console-based (without fancy windows) – a drawback for some, but experienced miners are accustomed to .bat files. However, the lack of a graphical interface is practically unnoticeable: stability and profit are the main focus, and GMiner excels in this area.
⚙️ Algorithms and coins supported by GMiner
One of GMiner’s main advantages is its wide range of supported algorithms (and therefore coins). Essentially, this miner alone can mine almost any popular GPU currency. Here’s a partial list:
| Algorithm | Examples of coins |
|---|---|
| Ethash | Ethereum (until 2022), EthereumPoW (ETHW) |
| ETChash | Ethereum Classic (ETC) |
| KawPoW | Ravencoin (RVN) |
| KHeavyHash | Kaspa (KAS) |
| Autolykos2 | Ergo (ERG) |
| Equihash (144.5; 125.4; 210.9, etc.) | Bitcoin Gold (BTG), Flux (FLUX), Zcash (ZEC), etc. |
| BeamHash | Beam (BEAM) |
| Cuckoo Cycle (29/31/32) | Grin, Aeternity (AE) |
| ProgPoW and variations | SERO, Zano, etc. (for example, FiroPoW is used for Firo) |
As you can see, the list is impressive . GMiner supports both trusted algorithms (such as Ethash/ETChash for Ethereum-like coins), GPU-friendly hashes like KawPoW (Ravencoin uses it), and completely new options like kHeavyHash (the algorithm behind the rapidly growing Kaspa). Equihash? You’re welcome – with various parameters for BTG, ZEC, Flux, and others. Even previously exotic options like Cuckoo Cycle (remember the hype around Grin) are on the list. Cool-Mining emphasized in its review that, starting with version 2.30, they added ETChash support specifically for Ethereum Classic after the hard fork, and also increased the speed of BeamHashIII, among other things – meaning the developers are responsive to market needs.
GMiner’s dual and triple mining support is also worth mentioning . While many miners previously used combined Ethash + Zilliqa (ZIL) mining—where the GPU spends most of its time mining Ethereum, switching to ZIL for a few minutes every hour for an extra coin—this became a problem after Ethereum’s demise. Not so for GMiner! Version 3.21 has already added support for dual KAS + ZIL mining , as well as many other combinations. For example, you can simultaneously mine Ethereum Classic + Zilliqa , Ravencoin + Zilliqa , and even triple mine ETC + KAS + ZIL. The miner quickly switches to the desired algorithm during the ZIL epoch, then switches back; hashrate losses on the primary coin are minimal. As a result, you receive additional income practically for free , which is certainly a welcome addition—especially in the post-Ethereum era, when every penny counts.
🚀 GMiner Performance and Features
In my opinion, GMiner is valued for its balance of convenience and efficiency . It delivers excellent hashrate on current graphics cards, and without any unnecessary fiddling around – the miner configures many settings automatically. For example, the software automatically selects the optimal “cores” for your GPU (called ” --kernelcores” in the parameters) based on the GPU architecture. The Crypto Mining Blog notes that GMiner can automatically configure parameters for your hardware – this makes life easier for beginners, and even pros don’t mind having GMiner handle their routine tasks. Plus, if you have a rig with multiple cards, you can run mining on all of them at once, or manually specify which devices to use ( --devices). The flexibility is complete.
Another popular topic worth mentioning is unlocking LHR video cards . When NVIDIA began limiting the hashrate of its GPUs, miner developers entered a race to be the first to bypass the limit. GMiner didn’t let up: over time, it learned to unlock up to 100% of LHR cards’ power. Remember how the GTX 3060 Ti or RTX 3070 Ti initially only offered half the speed on ETH? Then updates came out for GMiner, NiceHash, T-Rex, and others, and the restrictions became a thing of the past. That’s all history now, but the fact remains: GMiner quickly implemented new improvements , whether it was LHR unlocking or optimization for new algorithms.
I’d especially like to commend the miner’s stability. The miner is equipped with a watchdog function —it automatically restarts if the GPU freezes or the connection to the pool is lost. It also supports multiple pools (failover): specify backup addresses, and if the primary one is unavailable, the pool will switch automatically. There’s even a built-in power consumption display (approximately) for each card, which helps monitor energy efficiency. Overall, GMiner is designed for long-term, uninterrupted operation —whether at home on a single PC or on a large mining rig with dozens of GPUs.
Of course, no program is perfect . GMiner also has its own nuances that need to be addressed. Firstly, it’s paid software , meaning it has a developer fee. Typically, this is 1% of the output on popular algorithms (for example, Ethash/ETChash and KawPoW have 1%). On some others, it’s 2%, and in some cases, even higher (for example, the Cortex algorithm has a 5% fee). On average, about 1-2% of the output goes to GMiner’s creators, which is actually standard practice in the industry. As one forum joked, “24 minutes out of every 24 hours the rig works for the developer”—not that much, it’s manageable. Secondly, as already mentioned, GMiner doesn’t have a graphical interface —only a command line. For some, this is a drawback in terms of usability. But on the other hand, console miners consume fewer resources and operate transparently—the entire log is visible, no magic involved. So most users don’t complain.
Finally, an important point: where to download GMiner . Since the program is closed and distributed as an executable file, you should download it only from trusted sources ! I highly recommend the project’s official GitHub or links from reputable sites (such as Crazy-Mining, Crypto Mining Blog, and others, where the latest versions are always published). This will protect you from counterfeits and viruses, which are often used to disguise “miners” on dubious websites.
📋 How to Run GMiner: A Quick Guide
You’re probably wondering: how do I start mining with GMiner ? Don’t worry – if you’ve never used console miners before, I’ll briefly walk you through the process. It’s actually not as complicated as it might seem. Let’s get started:
Download GMiner. First, you need to download the program archive. The easiest way to do this is through the official GitHub repository (the project is called GMinerRelease ) – the latest versions for Windows and Linux are always available in the Releases section. For example, GMiner 3.20 is available via a direct link to GitHub. Once you’ve downloaded the archive, unzip it to a convenient folder. Inside you’ll find a file miner.exe(for Windows) and a bunch of other files.
Set up the launch file (batch file). Now comes the key step: configure the mining parameters . In the miner folder, create a text file with the extension .exe .bat(Windows) or .sh.exe (Linux). Enter one line (yes, just one!)—the launch command with the required arguments. The command template is as follows:
miner.exe --algo <algorithm> --server <pool_address:port> --user <your_wallet_address>.<worker_rebate_name>Let’s look at an example. Let’s say we want to mine Ethereum Classic (ETC) on the 2Miners pool. ETC uses the ETCHash algorithm , the 2Miners pool uses [unclear] etc.2miners.com, and the port is, say, 1010 (the standard port for the ETC pool). Your ETC wallet address is a character set you should already have (for example, taken from Trust Wallet or an exchange). You can specify any worker name (in Latin characters, without spaces)—for example, [unclear rig1] . Then the line in the batch file will look like this:
miner.exe --algo etchash --server etc.2miners.com:1010 --user 0xYourETCwalletAddress.rig1 You’ll, of course, substitute your wallet address for [your_wallet_address] 0xYourETCwalletAddressand change the rig name if desired. For other coins, these parameters will be different: the appropriate algorithm is used (for Ravencoin kawpow, it’s [your_wallet_address]), for Kaspa kheavyhash, [your_wallet_address] autolykos2), for Ergo, etc., the pool address is also unique (for RVN, for example, you can use a European server rvn.2miners.com:6060or an address from the list on the pool’s website), and the wallet is your address for the given coin. Most major pools, including Binance Pool, Ethermine, and F2Pool, provide clear connection instructions—simply follow them, entering the required line into the batch file. There’s a nuance with NiceHash: the username field specifies your account’s BTC address (and the algorithm is set to match the coin being mined). Here’s an example for NiceHash (mining RVN via KawPoW):
miner.exe --algo kawpow --server kawpow.eu-west.nicehash.com:3385 --user YourBTCAddress.NumberRigaDon’t worry if you don’t remember anything right away—you can always check the documentation or the forum. The point is, GMiner’s setup comes down to one line : what to mine, which pool to use, and where to send the reward.
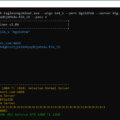
Launch the miner. Save your .batfile and double-click it to launch it. A black console window will appear—GMiner has started. First, the program initializes your video cards and may display technical information (e.g., driver versions, GPU data). If you’re mining ETH/ETC, it will begin generating a DAG file—please wait a bit, this is normal. Then you’ll see lines with the hashrate of each card, pool connection information, and accepted shares. Congratulations, mining is underway! Now the main thing is to make sure there are no errors (if there’s a typo in the address or wallet, the miner will report a connection error). Ideally, within a few minutes, you should see a message from the pool about a new job and an accepted share —this means your rig has successfully submitted its solution and it’s accepted.
GMiner has some useful options if you want to fine-tune your setup: you can limit GPU temperature ( --templimit), overclock/downvolt cards directly through the miner ( --lock_cclock, --lock_voltagelike in MSI Afterburner, but programmatically), set intensity, disable individual devices ( --devices), and much more. However, most beginners won’t need all of this—GMiner runs optimally and stably by default. You can always run it as is first, then read the guides and experiment with the settings once you feel confident.
A little tip: on Windows, your antivirus sometimes complains about the miner (a false alarm, as many viruses actually disguise themselves as mining programs). If you downloaded the GMiner file from an official source, you can add it to the exclusions list to prevent it from being deleted. Of course, make sure the source is reliable!
🤔 Conclusion
Well, Ethereum mining is history , but it hasn’t ended the era of GPU cryptocurrency mining. There’s still plenty to mine—you just need to be flexible and seek out new opportunities. GMiner proved its value precisely at such turning points. When the “big Ethereum” disabled PoW, GMiner didn’t fade into oblivion; on the contrary, it became one of the main tools for reorienting GPU farms to other coins. Thanks to support for multiple algorithms, updates, and features like dual mining, this software helped many miners survive the turbulence of 2022. And even today, in 2025, GMiner continues to improve and maintain its reputation.
If you’re a globally minded miner who doesn’t rely entirely on one card, but instead distributes your hashpower across different coins, you’ll definitely love GMiner. It’s like a universal soldier: it can handle Ethereum Classic , switch to Ravencoin , and even catch up with Kaspa and Ergo . And maybe even new coins will appear—the developers will surely add support, it’s not the first time. In crypto mining, the one who can quickly adapt wins. GMiner is one of those—an adaptive, multi-functional, and reliable miner’s assistant . Give it a try, figure out the settings, and it might become your favorite. Good luck with the pools, and may you have fat blocks!🚀
Links:
Read more:


 GMiner v2.19 [AMD/NVIDIA] Download and Configure for Windows & Linux.
  The Most Profitable Coins for GPU Mining in 2026 – What to Mine with Video Cards
  GMiner v2.09: Download AMD/Nvidia GPU Equihash miner